
Today’s topic is merging cells.
The tip today is super simple, but can really help when it comes to formatting and making your data presentable. Excel allows you to take two or more cells and merge them into one cell. Here is an example of how merged cells can be useful:
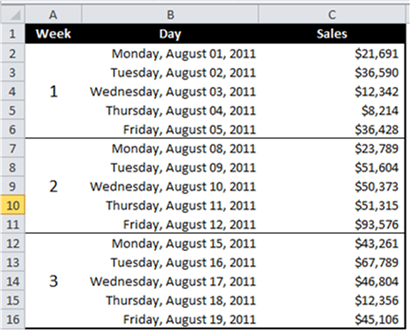
As you can see I’ve taken 5 cells and merged them into one for each week so the week number will look good within the table. Notice also how even though the week numbers are a much larger font size, the row has not increased its size which allows the other data in the table to look uniform.
Here is how to merge cells:
1. Highlight the cells you would like to merge
2a. PC: Click on “Home” and then from the “Alignment” section click on the icon which looks like this: ![]() (Keyboard shortcut Alt → H → M → C)
(Keyboard shortcut Alt → H → M → C)
2b. Mac: From the Ribbon click on “Home” and then from the “Alignment” section click on “Merge”
3. To unmerge the cells, follow the exact same steps.
Note: The vertical centering of the week numbers does not happen automatically, you have to tell Excel to do that using the “Middle Align” button which is just to the left of the merge button.
The example above showed vertical merged cells, but you can merge horizontally as well. This type of merging is very common for adding a title or label to a table. Go practice this tip since it is so simple. You’ll be glad you did!
Questions? Tip ideas? Let me hear you in the comments.